Friday, August 27, 2010

Another Day, Another Dollar

Today, after I came back from work and got Torin all registered for 1st grade (gulp, anyone?), I just couldn't be in my house. This was partially because I sometimes venomously hate my house, and partially because it was 69 and sunny and that's just my kind of weather. 

So, off to Blanford Nature Center the boys and I went.  We've been spending a lot of time on bikes lately, so I though "Why not, lets trek on down?"  Yeah, that's a mile and a half, baby.  With Torin on a Transformer's bike with training wheels.  He's a very tall six year old, so the knobby knees sticking out to form acute triangles was an image to cherish.  But by mile marker 1 he was whining about exhaustion, and it became less like escapism and more like work.  (Fun fact of the day: Blandford is decidedly all uphill from my house, which made toting Quinny in a trailer on my shitty bent-up Huffy less fun.)  But we made in tact, secured the bikes with my chain, and started stomping.

It was splendid and muddy and gloriously mosquito free. We spent time hanging out on the boardwalk through the "wetlands" (a stinky Michigan swamp if ever there was one, but we're in the city, after all) and sitting at the edge of the minor precipice behind the Center.  Oh, and did you know there is such a thing as neon orange fungus?  If you don't believe me, take the Blue Heron Highway trail out to the Interpretive Center.  It's pretty nifty stuff.

So, what have I done the garden this past week?  Nuthin.  Nadda.  Zilp, zitch, zero.  I have glanced at the sunflowers and morning glories and other splendid morning risers on my way out the door, but I haven't actually stepped foot past the purple garden gate.  Shame on me, I know, but I just haven't had the "umph".

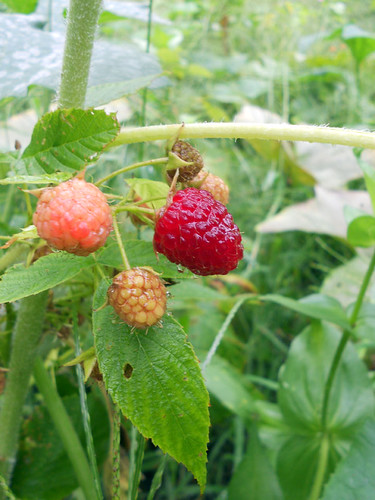
I went on a trip to St. Louis with the boys, my sister-in-law, and two nephews last weekend, and it was decidedly taxing.  I had the beginnings of a wicked cold, and all the flying around in puddle jumpers obviously didn't help the recovery process.  It was only a few days ago that my head didn't feel on the verge of spontaneous combustion.  So I take it on faith that the giant pumpkins are still turning orange, the sweet potatoes are getting big enough to eat, and the weeds still haven't completely snuffed out the marigolds that once so gloriously lined the charming garden pathways.

Erroneous assumptions?  Lets hope not.  I'm still just too damned tired to duck under the wicked grape vines that seem intent on barring passage out back.  I'll check in later with some photos of lush moonvine flowers (that I don't let the boys touch) and maybe a shot of the buttery yellow butternut that is doomed to be soup some crisp Autumn afternoon soon.

Autumn.  Damn.

Wednesday, August 18, 2010

Wordless Wednesday: Raspberries


Raspberries, originally uploaded by SummerAlyssa.

Tuesday, August 17, 2010

Yummy Treat Tuesday: Basil Pesto

This version of Yummy Treat Tuesday is brought to you without helpful photos, other than this pretty shot of my Red Osmin Basi.  Sadly, I haven't been able to find an affordable source of pine nuts since last year, so I haven't made any yet in 2010!

  • 2 cups basi (leaves, no stems)
  • 2 cloves of garlic
  • 1/4 cup pine nuts
  • 1/2 cup extra-virgin olive oil
  • 1 cup Parmesan cheese

Toast the pine nuts: drizzle a frying pan with a bit of oil, toss in the nuts, and shake them around in the pan until they’re brown. Dump into a bowl to cool.

Put basil, garlic, oil, and cooled nuts in your food processor, and let your chopping blade do it’s magic. Go for coarse, not liquidy.

Add oil and pulse until everything is well mixed.

If using immediately, pour the green good stuff (or purple if you've used purple basil) into a bowl and mix in the cheese.  Have a smackeral or two to make sure you don't prefer salt or pepper be added to the mix.

If freezing, hold off on adding the cheese until you're ready to use.

What is this good for?  My favorite use for basil pesto is a replacement for pizza sauce, with feta, kalamata olives, and artichoke toppings!  I also like it tossed with pasta, or thinned with olive oil and drizzled on bread, veggies, or as a spread on pita sandwiches. Mmmmmmm.....

Herb Preservation Part I : Herbs for Cooking

A thing of yummy scentedness can last a good long while!

So you have an herb garden.  You have dreams of cooking with fresh, organic herbs long into the winter, tossing stir-fries with flamey flourishes as you toss in basil with aplomb.  But, as fall draws near and you find your plants setting into their bitter ways, you begin to wonder.  How do I keep these puppies around for awhile?  Well, it depends on the herb and the purpose, really.

The following are some general guidelines for your first attempts.  Questions or suggestions?  Give a holler in the comments section!


Basic Prep

Whatever method you use, there a few first steps that don't vary.
  1. Harvest the herbs.  NEVER take more than 1/3 of the plant unless it's an annual.  ALWAYS harvest in the morning.  Use a sharp instrument so you don't damage the plant.  
  2. Clean them.  If you're freezing, oiling, or pasting, washing is fine.  If you're drying, just give them a few good shakes, or, if you're more paranoid than I am, use a barely damp cloth to wipe them.  And I do mean barely damp!  If you get them too wet and don't dry them off with a towel thoroughly enough, you're setting yourself up for mold.
  3. Remove all the bug eaten, diseased, or otherwise nasty looking parts.  You can remove whole leaves or (if the leaves are large) just cut off the damaged part.

Drying

Many herbs either taste much better (and stronger) dried, and drying can be the best way to ready them for use in teas and simmering or baking dishes.  The longer the dish has to cook, the better chance you have of the dried herb's flavor permeating it with spicy deliciousness.

Just about anything you like for tea should be dried.  Not only is a dried herb stronger and smaller for easier storage, but then you can mix your crispy goodies together for out of this world tea blends.  More on that later.

Other herbs that a best dried are dill, parsley, lemon verbena, oregano, rosemary, sage, summer savory, sweet majoram, thyme.  These have very low moisture content, so they will dry quickly without molding.

The best (and most tedious) method of drying herbs is the paper bag method.  This technique keeps dust contamination down and ensures that you capture any leaves that fall off the stem while drying.  It also prevents fading and evaporation from too much light. 

Paper Bag Method
  1. Buy a bundle of paper lunch sacks for chump change at whatever store closest to you carries them. 
  2. Using a hole punch, take out some of your anger management issues on the bags until they resemble swiss cheese.  Use the cushiest, most expensive punch you can find.  In my long experience, the cheap metal ones will have your hands red and cramped before you get enough for a pot of tea.
  3. Write the name of the herb on the bag.
  4. Tie small bundles of the herbs together.  And I do mean small.  You want them loose enough so they get good air circulation, otherwise they'll mold.
  5. Hang the bundle upside down in the bag, with the leaves preferably not touching the bottom or sides.  Any empty stems should stick out the top.  If there are no empty stems, leave enough of the string out the you can use it to hang the bag.
  6. Staple or tape the top.  
  7. Hang them all in a dry room away from direct sun.
  8. Check them every week to gauge progress and to toss the moldy ones.
  9. Once they're dry, store them in glass or tupperware away from direct sunlight.
  10. Use within a year.

My Method
  1. Tie small bundles of the herbs together.  And I do mean small.  You want them loose enough so they get good air circulation, otherwise they'll mold.
  2. Hang them upside down in a in a dry room away from direct sun.  (See photo above.)
  3. Once they're dry, store them in glass or tupperware away from direct sunlight.
  4. Use within a year.
You risk dust and dropped leaves, but I just hate wasting time, money, and flexible fingers on the paper bag method.

If you want to dry herbs with high moisture content (like basil, lemon balm, mint, and tarragon), you can use the above methods with some success if the weather is hot and dry.  Michigan weather being the finicky brat that it is, my luck is hit and miss.  Otherwise, you can use the oven on very, very low temps or use a food dehydrator.  I don't do either, so you'll have to look elsewhere for more details.

Freezing

Some can be frozen for use in sauces, stews, stir-fries, and ice cream.  
  • Borage flowers and mint do really well frozen in individual ice cubes.  They give a nice flavor and look to lemonade and iced tea.  Fill the cubes up half way and put the flower or sprig on top.  Let them freeze for a half hour or so, them fill the cubes up the rest of the way.  (This keeps the flora in the middle of the tray instead of floating to to the top.)  You can also do this with strawberries and violets in spring.  Note: if you boil the water before using it, your ice cubes will be less cloudy.
  • Chives, curry, lemon grass, and winter savory taste much better frozen than dried if you chop them up, lay them flat on a cookie sheet, and freeze them for 20 minutes or so before tossing them into a bag.  They also won't stick together in big clumps that are harder to measure when you pull them from the bag.
  • Basil, lemon balm, horehound, mint, summer savory, tarragon, and thyme do beautifully if you lay leaves or sprigs out on a cookie sheet, freeze for a couple hours, then lay into tupperware containers to be stacked back in the freezer.

Oils

Herb oils are pretty awesome culinary masterpieces.  They're beautiful and tasty, and can be used for frying, on salads, on steamed veggies, in pasta dishes, for dipping bread, and for marinating.

Good candidates for oils are basil, chervil, fennel, garlic, lavender, lovage, oregano, rosemary, sage, sweet marjoram, tarragon (my personal favorite), thyme, and winter savory (my other personal favorite).  You can also toss in dried citrus rind and peppercorns.  

There are some tricks to making oils in order to make sure it doesn't go rancid. If you've ever canned, you'll recognize some of these steps.
  1. Use clean, un-cracked, sterilized glass jars.  If you have a dishwasher, use the sterilize cycle.  If not, let them boil in water for 10 minutes.  Make sure they are completely dry before you put the oil in.
  2. Select your oil based on taste and ease of use.  I like extra-virgin olive oil.  (Though it does tend to go rancid more quickly than others.)   I've heard other kinds of oils don't go rancid as fast, especially sesame oil, but I've never tried them.
  3. Try to use leaves rather than sprigs.  Stems have air in them, and air in the oil can cause it to go rancid.  
  4. Put your herbs in first, then pour the oil on top of them.  Make sure they're completely covered.  
  5. Use a wooden dowel to run around the inside of the jar to ensure there are no air bubbles lurking around.
  6. Seal the jar.  If using canning jars, use either the metal or plastic lids that came with them.  If using cork, make sure it's in tight.
  7. Leave them in a sunny (really sunny) spot for two months.
  8. Open the jars to check to see if they're rancid.  If you see water on top, that's OK - it just means that you use a high moisture herb - like basil - that shed its water.  Just drain it off.
  9. Strain into a bowl, then pour it it's permanent home.  If you want to use the same jar, make sure that you clean and dry it first.
  10. Use it within 3 years.

Pastes

Pastes are pretty awesome to use in just about anything.  You definitely get a fresh flavor, and as a bonus it's a little more concentrated than fresh herbs.  You also can make some kick-ass mixes for handy use in soups, stews, and sauces.

You can use any herb you want in a paste.  I like mixes like:
  • thyme, lemon juice, garlic, and parsley for steamed veggies,
  • basil, oregano, sweet marjoram, and a pinch of sage as a base for any Italian recipe like pasta sauce, pizza sauce, and a base for soups and stews,
  • rosemary, winter savory, oregano, and garlic for potatoes
Generally speaking, you need two cups of fresh herbs per 1/2 cup oil.  Any kind of oil is fine - I mostly use canola.

Take your sprig, wash and dry it, hang it upside down over a bowl, and slide your fingers down over the stem.  This will drop the leaves into the bowl but leave the woody parts on the stem.  Once you've got two cups worth, pop them into a food processor bowl with the oil and blend until everything is chopped and mixed.

Spoon into your container of choice.  I like the smallish rectangular tupperware bowls.  They won't fully freeze because of the oil, so you can spoon out bits as you need. You can also use freezer bags, but they tend to get messy after awhile.

Monday, August 16, 2010

Pumpkins, Sunflowers, and Zinnias, Oh My!

I love summertime in Michigan.  It really does make up for the rest of the year.  Well, mostly I think so.  In the dead of winter ask me again, but for now, with cicadas humming and butterflies flittering and Lake Michigan calling my name, my geographical cup runneth over.

I’ve been so busy working and swimming and otherwise not being on the computer that I’ve neglected to check in every once and awhile.  But, the magic I started way back when the sun was still sleeping is really rewarding me now!

The squatty big leaved seedlings that looked like they could be fairy dresses?  They’re growing quite respectably sized pumpkins, squash, and gourds.


Those tiny green sticks that promised to be immortelles?  I’ve had dozens upon dozens of blooms.


And the tiny seeds I scattered out back, mixed in with the gourds and squashes and raspberries and sunflowers?  Blossoming in  gorgeous abundance.


And the sunflowers?  Oh, the sunflowers.  Every day I bask in their beauty before beheading them for use on my tables:)


There are tales of veggies and herbs on the way.  I’ve started a new drying system this year I’ll tell you about later.  Photo tutorial tomorrow, I think.  If you want to get ready to try what I’m trying, get yourself a cheap spool of wire (I used 20 gauge aluminum craft wire) and a couple ceiling hooks or plant hangers.  Yeah, you can see where I’m going with this.  Plot and scheme and imagine, and I’ll see you tomorrow.